
Taking good pictures of models and miniatures should not be and is not complicated. Here is what I have learned after overthinking about it and then recovering from research and equipment paralysis.
“Lights, Camera, Action!” Is that still a thing they say in movies? Because that sums up the first three things you need in taking good photos in general. This translates to desktop photography as well.
Good lighting is essential. Here I use a pair of IKEA Tertial Work Lamps fitted with IKEA Ryet LED Bulb. I also loosely tape a piece of baking paper over the lamps to diffuse the lights.
The softbox is optional. In fact, if you don’t already have one, don’t get one. Instead, go to your local art shop and get the thickest and largest white art paper you can get. Just tape the short end of the paper to something vertical like a wall or a monitor and let it fall and curve down onto the table to create an infinite white backdrop.
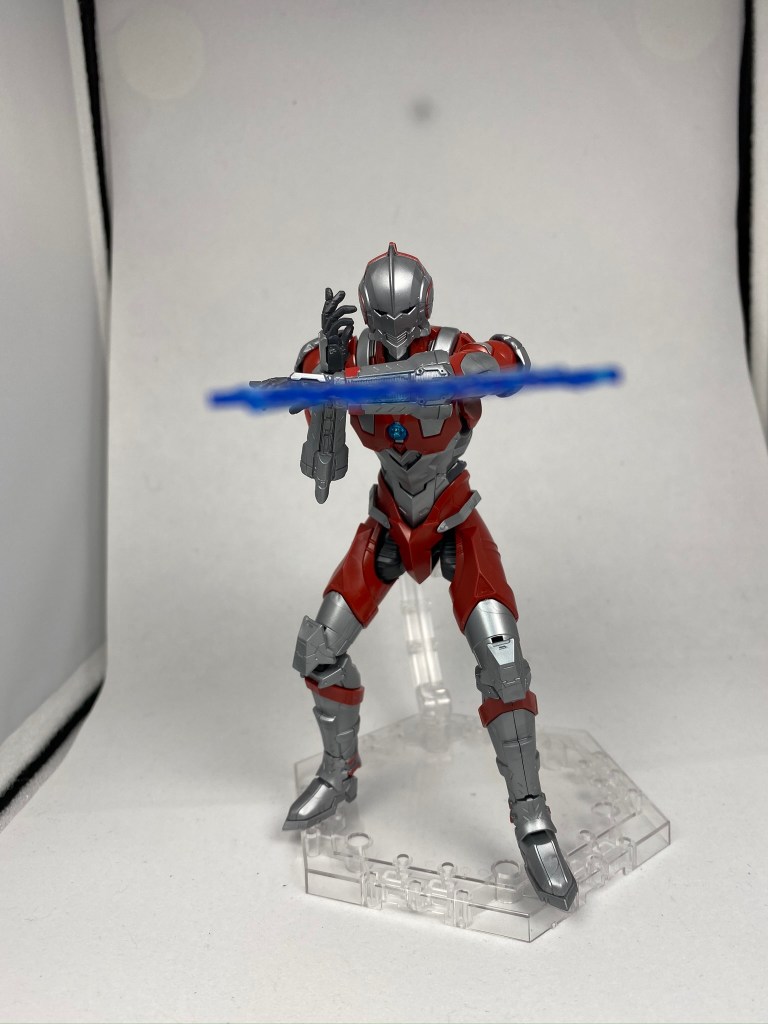
When it comes to the camera, use whatever you got! The key is lighting and later, editing. I’m using an iPhone 11 and as you can see, the picture is dark (so I can edit it later without losing detail) and was taken from further away (so everything is in focus).
You could always increase the photo’s brightness while taking the picture, but I am going to do some editing afterwards. Also, I don’t want the blurry background effect so I took the picture from further away. You’ll have to do this for most smartphones.
However, if I want that digital bokeh, I would use the portrait mode on the iPhone 11 instead. It works on objects too.
For scale models like the Ultraman Suit, getting the right action pose is important. For miniatures, you got to get the right angle. In both cases, you can always get ideas from the box the model came in.
Look at how the photos taken are usually at the model’s eye level, not from above or down low. Still, it varies from model to model. Vehicles, for example, look better when photographed at a higher angle. So let the box be your guide.
When taking the photo, remember to mind the spaces around the model. I imagine a smaller rectangle around my figure and make sure there is nothing but the subject within that area. That way there will be fewer things to clean up from the photo afterwards.
Once I get the photo I want, it is time to edit. My workflow is simple: crop the photo and brighten it without losing detail.
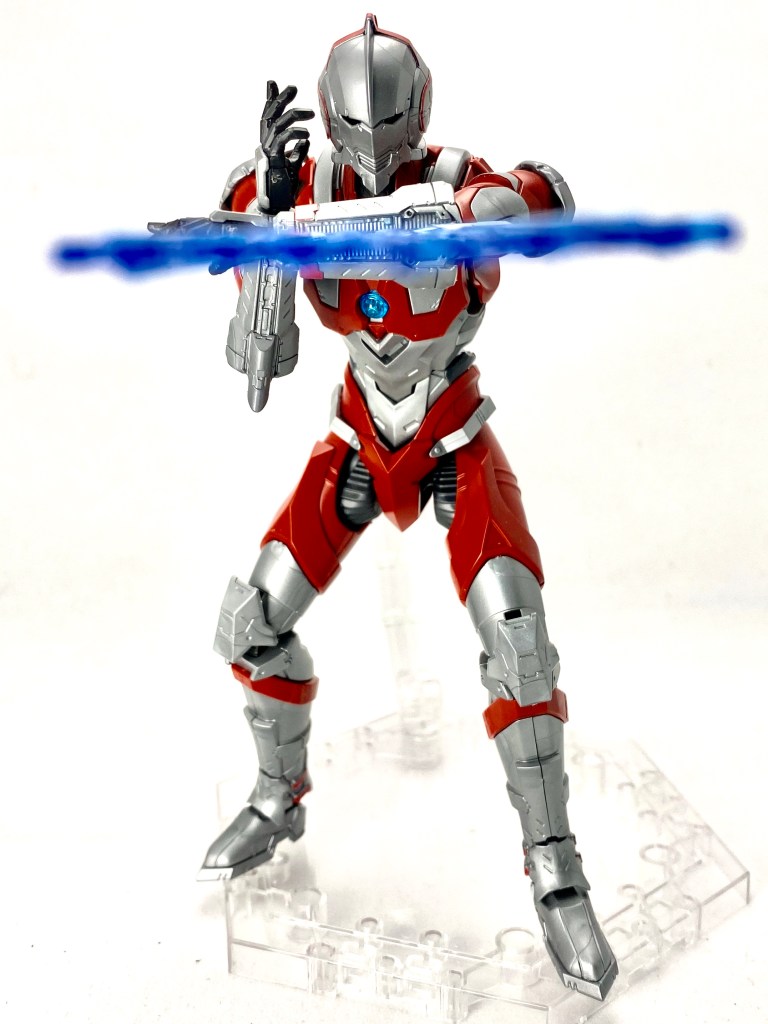
On the iPhone 11, I tap edit and crop the photo as close to the subject as I can, leaving some space around the model, of course. Next, I just set the adjustments to auto and increase the exposure until I get a stark white background without blowing up the details. I prioritise detail over the background. This means I will increase the exposure as long as I don’t lose any details on the model.
We could stop here. But, with a scale model like Ultraman Suit, we can go a bit further. The kit comes with a transparent base, an essential tool and accessory for posing the model. Since I am using a white background, why not remove the stand from the photo.

With a simple background like mine, the process is as easy as painting over the stand with white using Markup. But, for more finesse, I use Retouch. The app is useful for removing unwanted obstructions in photos. So if your background is not a single colour, perhaps a blurry background, use this app instead.
As you can see, the result is pretty good.
